Axle capacity
The axle tag and GAWR help identify the brake and hub configuration designed for the trailer’s running gear.
Electric-Over-Hydraulic Conversion
Understand fitment, installation, and the information needed before ordering a disc brake conversion for your trailer.
Brake Upgrade Planning
A properly matched trailer disc brake conversion can provide consistent, fade-resistant braking and self-adjusting operation. The conversion is not a one-size-fits-all parts purchase: the axle, wheel, hub, brake-controller, and trailer configuration all affect the correct kit.
Ramblin’ Man RV installs DeeMaxx and Kodiak by Dexter disc brake systems for compatible towable RVs. We review the trailer information before parts are ordered and can coordinate mobile installation at a safe, permitted location.
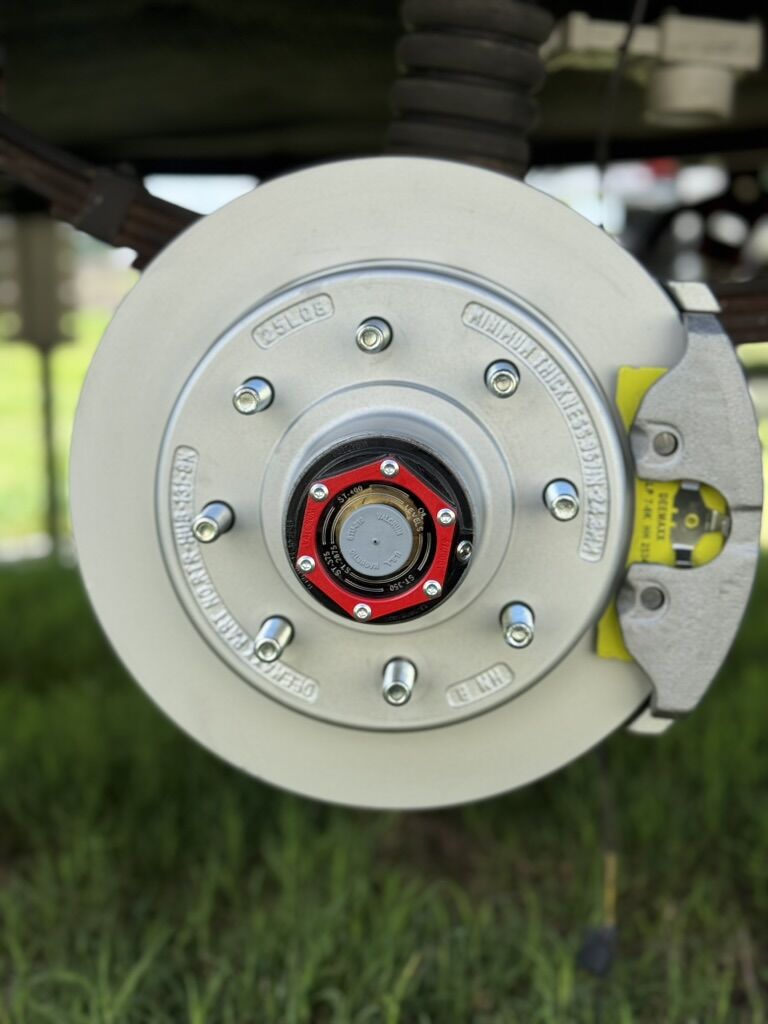
Fitment Comes First
The axle tag and GAWR help identify the brake and hub configuration designed for the trailer’s running gear.
Wheel size, bolt pattern, and available clearance must match the selected rotor, hub, bracket, and caliper arrangement.
Existing hubs, drums, spindles, brake assemblies, bearings, seals, and hydraulic or electrical components affect the parts needed.
Single-, tandem-, and triple-axle trailers require different kit quantities and brake-line planning.
The tow vehicle’s controller must be compatible with an electric-over-hydraulic actuator and the completed trailer system.
Available system configurations may use different corrosion-resistant finishes. Product pages show the approved options for each system.
Installation Process
Confirm trailer, axle, wheel, controller, and location information.
Select the correct approved kit and related components before ordering.
Install the disc brake components and hydraulic system for the confirmed configuration.
Fill and bleed the hydraulics, inspect for leaks, test braking, and reinstall the wheels.
Available Systems
DeeMaxx and Kodiak by Dexter product pages contain the current approved configurations, finish choices, and required trailer information. Prices and selectors remain on those product pages so the fitment guide does not create conflicting catalog information.
Common Questions
Many compatible trailers can be converted to electric-over-hydraulic disc brakes. Correct fitment depends on axle capacity, wheel and bolt pattern, existing brake and hub components, trailer configuration, and tow-vehicle brake-controller compatibility.
Useful information includes the trailer year, make, and model; axle-capacity tag; wheel and bolt pattern; current brake type; single, tandem, or triple-axle configuration; and tow-vehicle brake-controller details. Clear photos can help confirm what is installed.
The hydraulic system is filled and bled, checked for leaks, and tested. Wheels are reinstalled and torqued. Follow the manufacturer’s break-in guidance and have lug nuts rechecked after 50–100 miles, normally to 120 ft-lb unless the technician specifies otherwise.
Available products and order options are shown in Shop Parts & Upgrades. Fitment still needs to be confirmed before the correct configuration is ordered.
Tell us about your trailer, what you are experiencing, and where it is safely parked. We will help identify the right next step.